Stereotaxic Digital Device
Digital stereotaxic frame providing precise X/Y/Z coordinate positioning for targeted brain interventions using anatomical skull landmarks in mouse and rat neurosurgery procedures.

Louise Corscadden, PhD
Director of Science · ConductScience
Ask Louise about Stereotaxic Digital Device fit, setup, configuration, or quote prep.
Already working with us? Sign in to connect this with My Scientist.
Key Specifications
Full details →- Model fit
- Mouse, Rat
- SKU family
- CS-STS-SM100D/CS-STS-SM200D/CS-STS-SR100D/CS-STS-SR200D
- Sizing
- 30.0 x 25.0 x 25.0 cm
- Ordering
- Online checkout and quote request available
- Category
- Stereotaxic Complete Systems
- Build notes
- Confirm accessories, station layout, and support needs before purchase
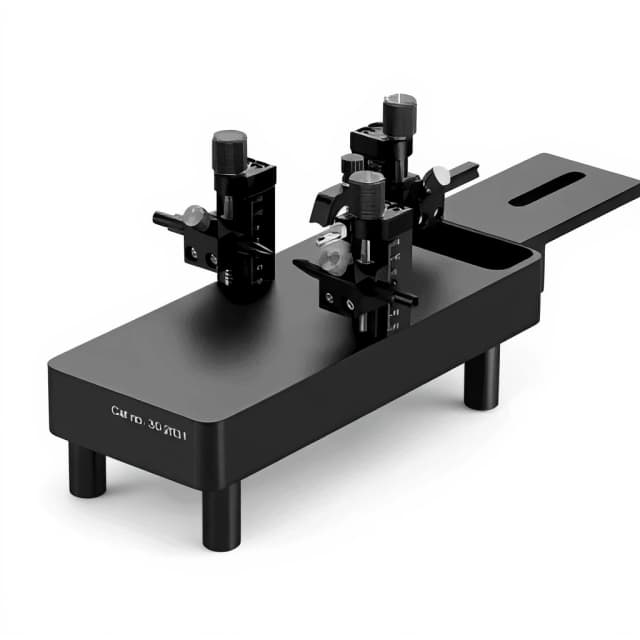
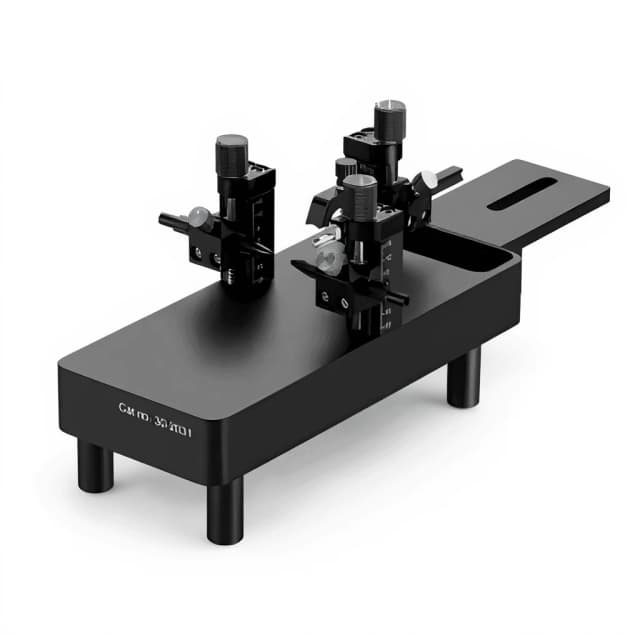
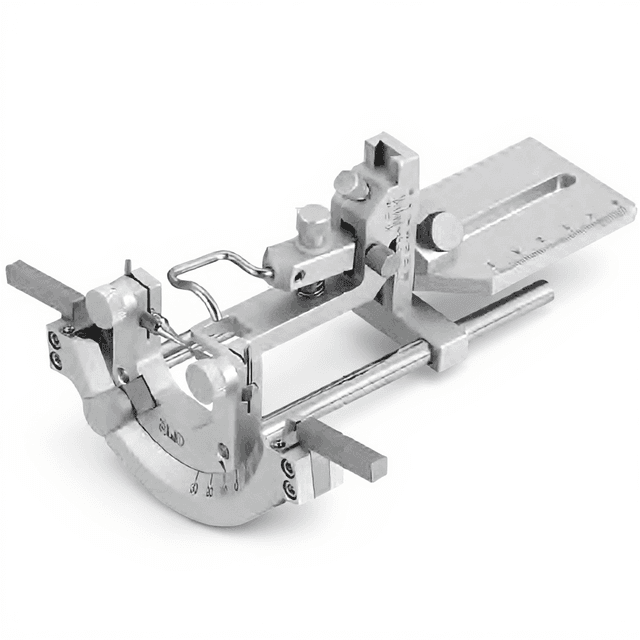
The Stereotaxic Digital Device provides precise three-dimensional coordinate positioning for targeted brain interventions using anatomical skull landmarks including bregma, lambda, sagittal suture, external auditory meatus, and tooth bar. The system utilizes X/Y/Z three-dimensional coordinates with main and vernier scales to determine the exact location of subcortical brain regions for injections, stimulations, lesions, and electrode placement procedures.
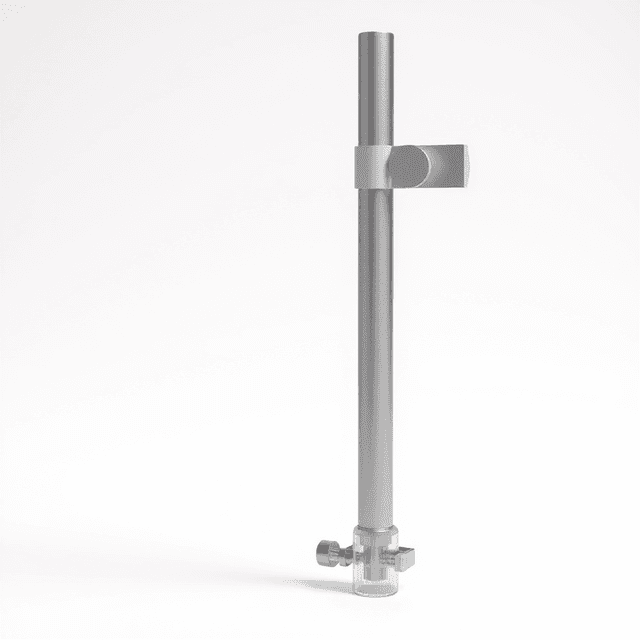
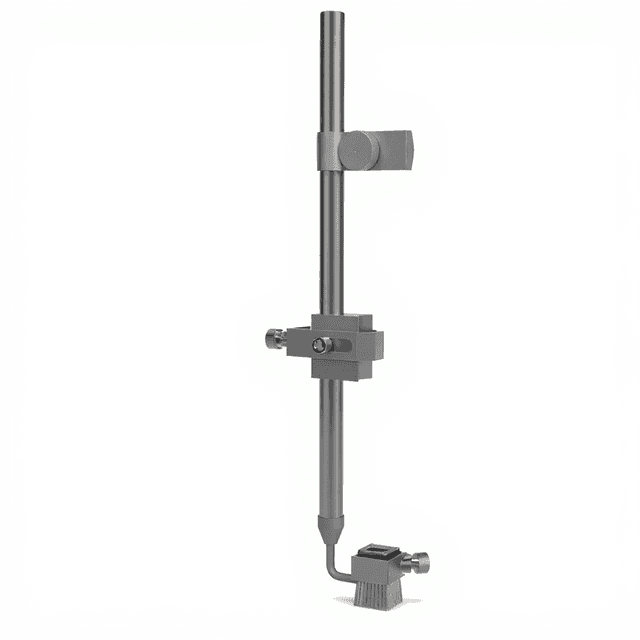
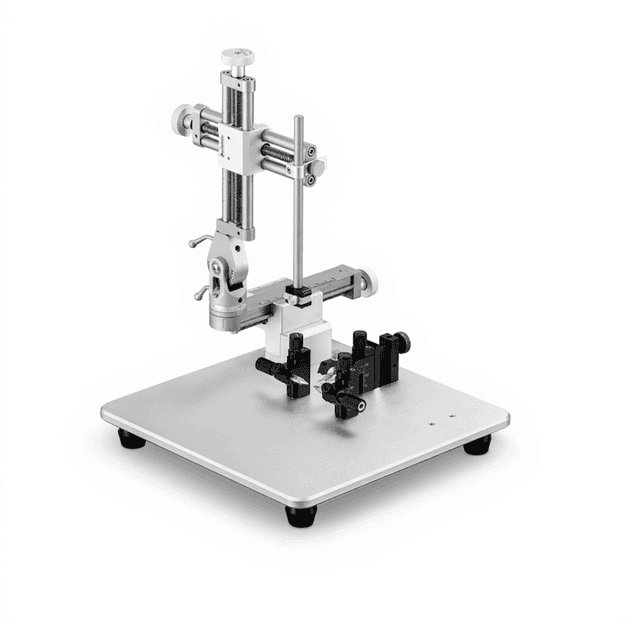
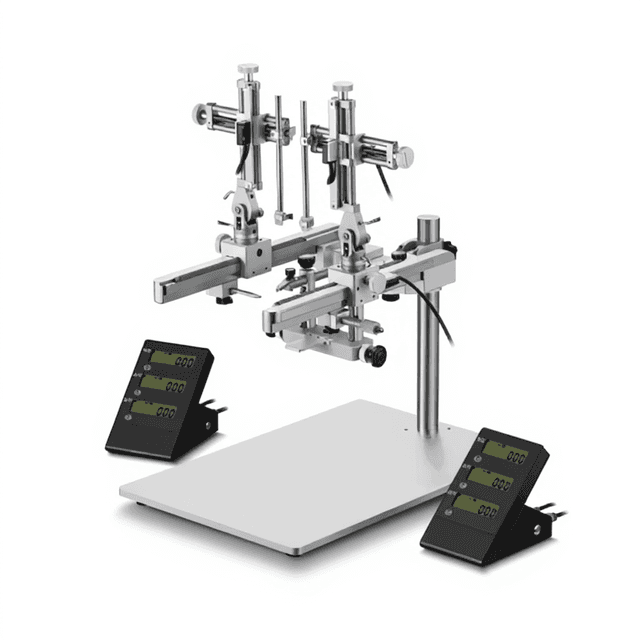
The device features triangular guide rails for rapid positioning with universal contact points enabling lateral and longitudinal movement. Operating arms rotate from the bracket to accommodate various experimental configurations. The transmission system combines screw rod and rolling mechanisms rather than traditional metal-to-metal grinding to maintain coordinate stability and accuracy over extended use periods. Available in single or double arm configurations for mouse and rat procedures.
How It Works
The stereotaxic technique relies on the consistent spatial relationship between external skull landmarks and internal brain structures across individual animals of the same strain and age. The device establishes a three-dimensional coordinate system using the bregma (intersection of coronal and sagittal sutures) as the primary reference point, with additional landmarks including lambda, sagittal suture, and external auditory meatus providing verification of proper head positioning.
Target coordinates are determined from standardized stereotaxic atlases that map brain structures relative to bregma in anteroposterior, mediolateral, and dorsoventral dimensions. The main and vernier scales provide precise measurement of manipulator arm movement in 0.1mm increments. The incisor clamp maintains head position at 3.3±0.4mm below the centerline connecting left and right ear bars, establishing the proper skull angle for coordinate accuracy.
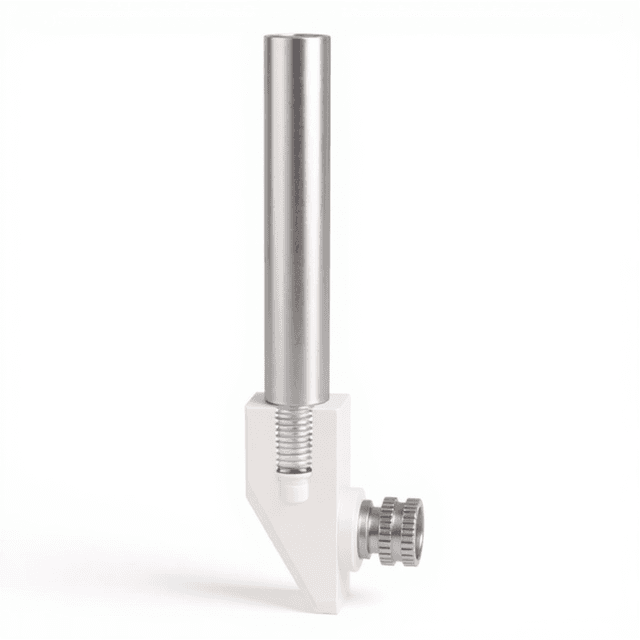
The transmission mechanism combines screw rod threading with rolling contact points to eliminate backlash and maintain positional stability during fine adjustments. Triangular guide rails with universal contact points allow rapid initial positioning while molded transmission screws and thread sleeves ensure consistent movement resolution across all three axes.
Features & Benefits
Arm
- Single
- Double
positioning_system
- X/Y/Z three-dimensional coordinates
coordinate_scales
- main and vernier scales
guide_rails
- triangular guide rails
reference_points
- bregma, lambda, sagittal suture, external auditory meatus, tooth bar
incisor_clamp_position
- 3.3±0.4mm below centerline connecting left and right ear bars
transmission_mechanism
- combination of screw rod and rolling mechanisms
arm_configuration
- rotating operating arms with universal contact points
Automation Level
- manual
Species
- Mouse
- Rat
Display Type
- Digital
Research Domain
- Addiction Research
- Behavioral Pharmacology
- Learning and Memory
- Motor Function
- Neurodegeneration
- Neuroscience
- Pain Research
Weight
- 18.08 kg
Dimensions
- L: 30.0 mm
- W: 25.0 mm
- H: 25.0 mm
| Feature | This Product | Typical Alternative | Advantage |
|---|---|---|---|
| Coordinate Display Type | Digital readouts with main and vernier scales | Many entry-level models use analog dial indicators or basic mechanical scales | Digital displays eliminate reading errors and provide consistent measurement precision across operators |
| Transmission Mechanism | Combination screw rod and rolling mechanism | Traditional systems often use metal-to-metal grinding or basic rack-and-pinion drives | Reduces mechanical wear and maintains coordinate accuracy over extended use periods |
| Guide Rail Design | Triangular guide rails with universal contact points | Standard models typically feature basic linear rails with limited adjustment options | Enables rapid positioning adjustments and accommodates various electrode configurations |
| Arm Configuration Options | Single and double arm models available | Many systems offer only single arm configurations | Double arm capability supports bilateral procedures and complex experimental designs |
| Reference Point System | Multiple landmarks including bregma, lambda, sagittal suture, and ear bars | Basic systems may rely primarily on bregma positioning alone | Multiple reference points improve coordinate verification and positioning accuracy |
| Species Compatibility | Designed for both mouse and rat procedures | Some models are optimized for single species use | Versatile sizing accommodates multiple rodent species in the same laboratory setup |
This stereotaxic system combines digital coordinate precision with mechanical stability through its specialized transmission mechanism and multi-landmark reference system. The triangular guide rail design and universal contact points provide operational flexibility for diverse experimental protocols.
| Model | SKU | Listed price | Status | Dimensions |
|---|---|---|---|---|
| Double | CS-STS-SR200D | $6,606.00 | Available | 48 x 34 x 19 cm |
| Single | CS-STS-SR100D | $3,851.00 | Available | 48 x 34 x 19 cm |
| Double | CS-STS-SM200D | $6,606.00 | Available | 48 x 34 x 19 cm |
| Single | CS-STS-SM100D | $3,851.00 | Available | 48 x 34 x 19 cm |
Practical Tips
Zero all coordinate axes with manipulator arms fully retracted, then verify accuracy using precision gauge blocks at multiple positions across the working range.
Why: Systematic calibration verification ensures coordinate accuracy across the entire manipulation volume.
Clean guide rails weekly with isopropanol and apply light machine oil to transmission components monthly to prevent binding.
Why: Regular maintenance preserves smooth operation and prevents coordinate drift from accumulated debris or corrosion.
Allow anesthetized animals to stabilize for 5-10 minutes after positioning before beginning coordinate measurements to account for tissue settling.
Why: Tissue relaxation can cause small shifts in skull position that affect coordinate accuracy.
If coordinate readings drift during procedures, check ear bar symmetry and incisor bar clamping pressure for consistent head positioning.
Why: Asymmetric positioning or inadequate fixation allows skull movement that compromises coordinate accuracy.
Record all coordinate positions and anatomical landmarks in laboratory notebooks with timestamp and animal identification for experimental traceability.
Why: Detailed coordinate documentation enables procedure replication and troubleshooting of experimental variability.
Use appropriate anesthesia monitoring and warming pads during extended stereotaxic procedures to maintain animal physiological stability.
Why: Physiological changes during anesthesia can affect brain position and experimental outcomes.
Cross-reference coordinate measurements between left and right hemisphere landmarks to verify symmetric head positioning before targeting.
Why: Bilateral landmark verification confirms proper skull alignment and reduces targeting errors.
Consider strain-specific stereotaxic atlas variations when calculating target coordinates, particularly for aged animals or specialized genetic lines.
Why: Anatomical variations between strains can introduce systematic coordinate errors if not accounted for in targeting calculations.
Setup Guide
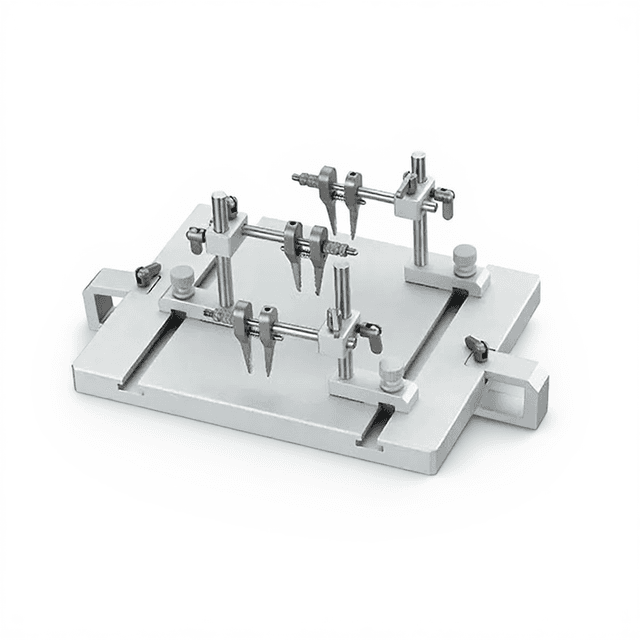
What’s in the Box
- Stereotaxic frame with base platform
- Single or double manipulator arms (model dependent)
- Ear bars and alignment hardware
- Incisor/tooth bar assembly
- Coordinate scale assemblies with vernier readouts
- Universal contact point adapters
- Allen wrench set and adjustment tools
- User manual with coordinate atlas references
- Leveling bubble indicators (typical)
- Spare transmission components (typical)
Warranty
ConductScience provides a standard one-year manufacturer warranty covering mechanical components and coordinate accuracy specifications. Technical support includes setup guidance, coordinate calibration procedures, and troubleshooting assistance for optimal system performance.
Compliance
What coordinate accuracy can be achieved with the main and vernier scales?
The system provides coordinate measurements with vernier scale precision, typically achieving 0.1mm resolution across all three axes when properly calibrated and maintained.
How do I ensure proper skull positioning for coordinate accuracy?
Position ear bars symmetrically and adjust the incisor bar to maintain the skull at 3.3±0.4mm below the centerline connecting ear bars, ensuring bregma and lambda are in the same horizontal plane.
What is the advantage of the screw rod and rolling mechanism over traditional designs?
This transmission system eliminates backlash and metal-to-metal grinding wear, maintaining coordinate stability and accuracy over extended use compared to conventional metal gear systems.
Can the system accommodate bilateral injections or recordings?
Double arm configurations enable simultaneous bilateral targeting, while single arm models require sequential positioning for bilateral procedures.
What maintenance is required to maintain coordinate accuracy?
Regular cleaning of guide rails, lubrication of transmission components, and periodic verification of coordinate scales against known reference points ensures continued accuracy.
How do I verify that target coordinates match stereotaxic atlas specifications?
Use multiple anatomical landmarks for cross-reference verification and consider strain-specific atlas variations when calculating target coordinates from published references.
What electrode or injection hardware is compatible with the manipulator arms?
The universal contact points accommodate standard microelectrodes, injection cannulae, and fiber optic assemblies with appropriate mounting adapters.
How does this system integrate with other neurophysiology equipment?
The frame design allows integration with electrophysiology amplifiers, optogenetic stimulation systems, and imaging equipment without interference to coordinate positioning accuracy.
Have a question about this product?
Have a question? Just ask.
Send it over and we'll email you a personalized answer — no call, no scheduling.
Prefer to talk it through?
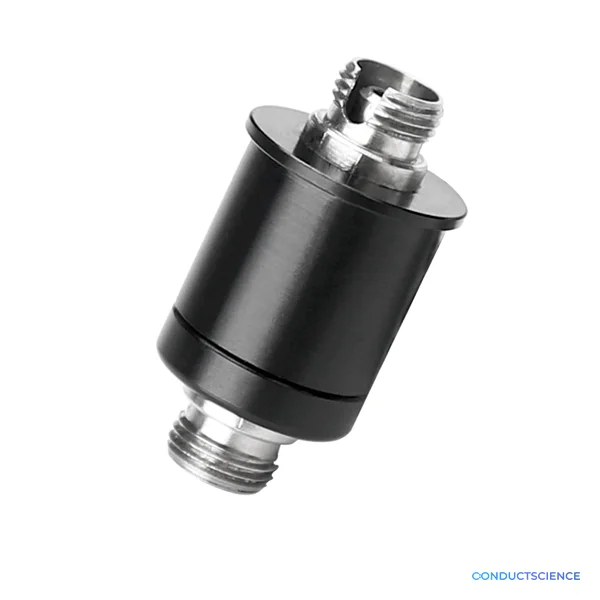
Accessories
Enhance your setup with compatible accessories