Description of Microtome
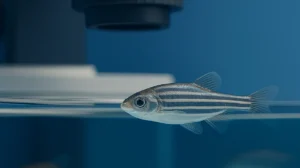
Generally, microtomes are involved in the process of preparing samples of biological material to be examined under a microscope. Specifically, they slice material into extremely thin pieces so they can fit in a microscope slide and be studied by researchers. It holds the material in place while a very sharp glass or diamond-edged knife slices it into pieces a few tens of microns thick.
The History Behind Microtomy and the Microtome Device
When the microscope was invented, scientists needed to slice material. Before the microtome was created, scientists would manually cut pieces of material they wanted to inspect using a razor blade. This method of preparing samples for the study was tedious and difficult so, naturally, an alternative needed to be invented.
Cummings, a manufacturing company, designed manual sectioning instruments made out of wood in 1770. These instruments were used exclusively in botany for cutting plants. Then the term “microtome” was coined in 1839 by Chevalier.
However, it was actually Rudolf Thoma who designed the very first official microtome, called the “Thoma microtome”. From there, the microtome evolved into different types and styles, used for different purposes.
Most Popular Types of Microtome Machines
1. Rotary
The most versatile and frequently used version. It works in a rotational manner. The knife is motionless, remaining in a horizontal position. The machine body itself rotates around the blade, slicing as it goes. For example, the machine holds the sample just above the knife, then it moves down over the knife, slicing a piece of the tissue off, then the machine pulls back and moves upwards before starting again. This produces tissue slices of 1-60 micrometers.
2. Sledge
Works by holding the sample still in the “shuttle”, which then advances and retreats over the blade. The slices that this machine produces are similar in thickness to a rotary microtome, however, it cuts tissues that are much “tougher” and are therefore hard to slice – more pressure is placed on the sample so a smooth cut can be made. Biologists use this type of machine for cutting bones and other difficult materials.
3. Vibrating
A vibrating blade is the defining characteristic of this machine. This allows tough and hard samples to be cut without applying the pressure that another mechanism, with a stationary blade, would instill. This machine produces slices from 30-50 micrometers thick.
4. Saw
When a sled microtome can’t cut precisely and effectively, a saw-based machine is necessary. Similar to a sled, this microtome is used when materials are extremely hard, like bones or teeth, and require more force. A rotating saw is used to slice. This microtome produces slices that are, at a minimum, 30 micrometers thick.
5. Laser
A laser is used for precise cutting without actually touching the sample. Due to the state-of-the-art technology, this machine enables non-contact slicing without causing thermal damage. The laser machine slices tissues between 10-and 100 micrometers thick. This is also an automatic machine, whereas the others would be classified as manual.
Microtome
Features & Parts of the Microtome
There are different microtomes, but they all consist of three main parts:
- Base (microtome body)
- Knife attachment and blade
- Material or tissue holder
Some microtomes have more features, like a desk clamp to hold the machine in place. Some devices are manually used, while others are automatic, so the specific features would differ in these microtomes.
Regardless of the machine being used, microtomy basically all comes down to the knife. A sharp, blemish-free blade is essential to accurately and effectively slice a sample. Generally, the knives are either planar concave, wedge-shaped, or chisel-shaped designs.
How to Operate a Microtome Machine
Before even using a microtome, samples need to be embedded, meaning that they should be put in a more rigid fixative. To do this, the sample needs to be covered in wax or epoxy. This is then placed in a mold to cool and harden, making it ready to slice.
Then, with most microtome machines, a section is cut by advancing the material holder towards the blade whilst the knife is held rigidly still. The actual slicing motion, whether it be on a vertical or horizontal plane, is combined with the advanced mechanism, so that the material holder is moved after each slice. The distance that the holder is moved can be selected using a scale setting on the machine body.
Care Instructions
The most important instruction is to clean the instrument daily. If you don’t clean it regularly, the knife can get rusty and it will get harder and harder to slice samples effectively. That being said, you should always remove the knife before cleaning.
It is also essential to remove waste from the blade and machine. This can be done using a dry paintbrush. Do not clean the outer surfaces with alcohol or xylene as the machine is likely not resistant to these solvents and exposure to xylene should be avoided. Paraffin remover, mild commercial household cleaners, or soap and water are recommended.
It is extremely crucial to make sure that no fluid enters the inside of the instrument during cleaning. This could compromise the efficiency of the machine and could potentially harm the inner workings of the microtome.
For the final care instruction, as with most scientific equipment, it is recommended to have the instrument inspected at least once a year by a qualified service technician.
In conclusion, there are many different kinds of microtome machines commercially available. It is important to understand the type of job or sample that needs slicing before purchasing a machine. Understanding the components and the way a specific machine slice is also essential in order to choosing the right microtome.
References
- Gudrun Lang (2006). Histotechnik. Praxislehrbuch für die Biomedizinische Analytik.(Histology: practical textbook for analytical biomedicine). Springer, Wien/New York. ISBN 978-3-211-33141-5.
- https://www.leicabiosystems.com/pathologyleaders/steps-to-better-microtomy-flotation-section-drying/
- https://www.sciencedirect.com/topics/neuroscience/microtome
- https://biomedizin.unibas.ch/fileadmin/user_upload/biomedizin/core_facilities/histology/Guides/Paraffin_methods.pdf
- https://www.labmanager.com/lab-health-and-safety/2010/06/microtome-safety#.XV6kn5NKiL8
- https://brainresearchlab.com/information/microtome-knife-use-and-care/
- http://www.microbehunter.com/parts-of-a-microtome/
- https://www.labce.com/spg605374_instrumentation_for_microtomy_rotary_microtome_par.aspx