

As an Amazon Associate Conductscience Inc earns revenue from qualifying purchases
An integral component of every doctor’s routine physical assessment is an inspection of the eye, a procedure called fundoscopic examination. Fundoscopy is a painless technique that allows the observer to gather a visualization of the patient’s retina. These observations come in handy for the medical diagnosis of common medical conditions such as diabetes, hypertension, vascular disease, and lipid disorders. These illnesses typically cause secondary changes in the retina, and their progression can be examined through a quick, 5 to 10-minute check-up of the fundus of the eye. Ophthalmoscopes, the primary tools for this procedure, have, therefore, earned their spot as standard instruments in the doctor’s arsenal, not just for ophthalmologists only.
The inspection of these regions can provide significant clues on the probable cause of a simple headache or symptoms of some serious vascular condition. For instance, pathological optic cupping, which is signified by an abnormally large optic cup-to-disc ratio, could be suggestive of glaucoma, an elevated intraocular pressure that can lead to loss of vision or irreversible blindness. Optic disc edema, the swelling of the optic disc due to an increase in fluid, is another ophthalmoscopic condition with serious underlying causes such as increased intracranial pressure or papilledema, infarction, inflammation, or infiltration of cells suggestive of cancer. In patients with severe hypertension, retinal hemorrhages found during fundoscopy signify categorization to accelerated hypertension. Diabetic retinopathy, a condition experienced by people with diabetes wherein high blood sugar levels cause damage to blood vessels in the retina, could be diagnosed early with the recognition of lesions during ophthalmoscopy.
More than two centuries ago, observers believed in something called the “Black Pupil” phenomenon, wherein eyes of animals appeared to look bright or luminous when they were excited–something that was not observed among humans. Further examination proved that this illumination was due, in fact, to a reflective layer behind the retina, a structure that also existed in human eyes. So why was the human eye not as reflective as the eyes of animals? Simply because the rays of light that were supposed to hit a person’s eyes were often blocked by the head of the observer.
It was only in the middle of the 19th century that scientists were able to procure special circumstances that would adequately illuminate the human eye, wherein the primary light source would be placed adjacent to the eye of the observer, far from but parallel to the eyes of the subject. This discovery is similar to what usually occurs when we take photographs with a flash, and people’s eyes seem to appear red. Thus, this makes up the key concept of how ophthalmoscopes work–the illumination axis and the observer’s viewing axis should be placed as close to each other as possible. Charles Babbage was the first to come up with a basic design for an ophthalmoscope in 1849, using a piece of mirror with a small hole in the center, and a gas flame as the primary light source. This ingenious setup allowed the illumination and viewing axes to be coincident, and the image of the eye is formed on the observer’s retina. Shortly after, in 1851, Hermann von Helmholtz invented what would be the blueprint for today’s modern direct ophthalmoscope.
Instead of using a mirror with a hole at the center, modern direct ophthalmoscopes use tilted mirrors beneath and adjacent to the device’s viewing aperture. Combining the light source with the rest of the device became a possibility because of the invention of the electric incandescent lamp. The modern direct ophthalmoscope also comes with parts that allow adjustment of the size, shape, and color of the illumination beam, and adjustment of lens magnification power to allow focus on different eye structures as well as for compensation in cases of myopia or hyperopia in both subject and observer.
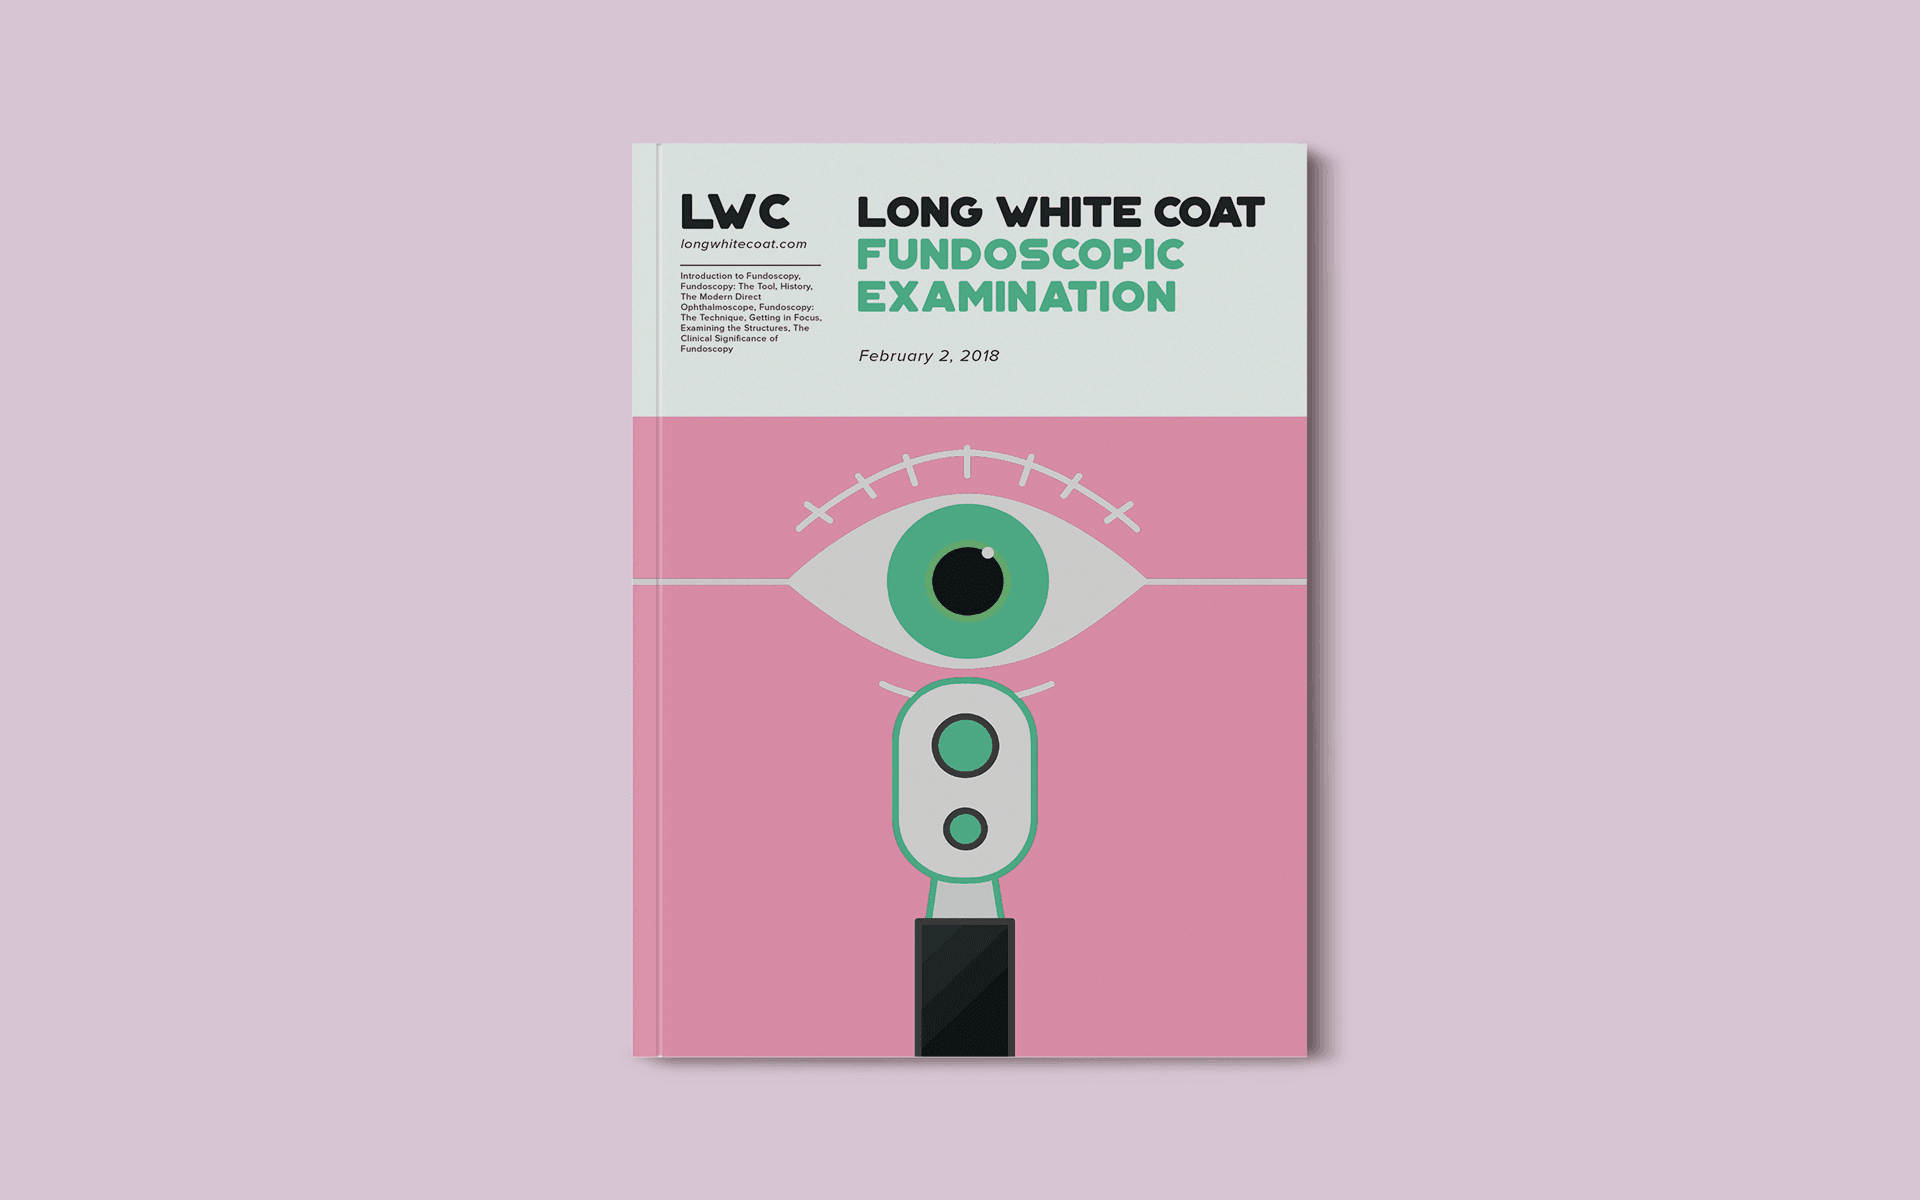
Described simply, the standard ophthalmoscope is light with different optical modifications such as filters and lenses of different sizes. For this purpose, the magnifying power of traditional ophthalmoscopes and its many different variations help doctors see patients’ retinas clearly and conveniently. This tool operates by illuminating the retina, the thin layer of tissue lining the eye near the optic nerve, through the hole in the iris, the pupil. The light rays that hit these parts of the eye are then able to form an image of the fundus, the overall area opposite the lens and pupil, magnified for viewing through the lens of the ophthalmoscope.
Given the importance of such a procedure in improving and saving lives, different technological advances have helped update and refine the tool with which doctors can successfully conduct fundoscopic examinations. Aside from direct ophthalmoscopes, some doctors also make use of indirect ophthalmoscopy by shining a light from an instrument worn on the head, viewing the eye through a separate diopter lens held close to the eye. This other procedure gives a wider field of view than direct ophthalmoscopy and produces an inverted image of the back of the eye. Slit-lamp ophthalmoscopy, on the other hand, requires patients to be seated in front of a large, stationary instrument with their head resting and kept in place. These machines are what we usually see in eye clinics and optical stores. Slit lamp ophthalmoscopes are low power microscopes that offer the same view as indirect ophthalmoscopes, but with a higher magnification. More advanced devices, such as the PanOptic Ophthalmoscope, offer a larger field of view and higher magnification than standard ophthalmoscopes, as well as allowing a greater distance between patient and doctor for more comfort.
More than two centuries ago, observers believed in something called the “Black Pupil” phenomenon, wherein the eyes of animals appeared to look bright or luminous when they were excited–something that was not observed among humans. Further examination proved that this illumination was due, in fact, to a reflective layer behind the retina, a structure that also existed in human eyes. So why was the human eye not as reflective as the eyes of animals? Simply because the rays of light that were supposed to hit a person’s eyes were often blocked by the head of the observer.
It was only in the middle of the 19th century that scientists were able to procure special circumstances that would adequately illuminate the human eye, wherein the primary light source would be placed adjacent to the eye of the observer, far from but parallel to the eyes of the subject. This discovery is similar to what usually occurs when we take photographs with a flash, and people’s eyes seem to appear red. Thus, this makes up the key concept of how ophthalmoscopes work–the illumination axis and the observer’s viewing axis should be placed as close to each other as possible. Charles Babbage was the first to come up with a basic design for an ophthalmoscope in 1849, using a piece of mirror with a small hole in the center, and a gas flame as the primary light source. This ingenious setup allowed the illumination and viewing axes to be coincident, and the image of the eye is formed on the observer’s retina. Shortly after, in 1851, Hermann von Helmholtz invented what would be the blueprint for today’s modern direct ophthalmoscope.
Instead of using a mirror with a hole at the center, modern direct ophthalmoscopes use tilted mirrors beneath and adjacent to the device’s viewing aperture. Combining the light source with the rest of the device became a possibility because of the invention of the electric incandescent lamp. The modern direct ophthalmoscope also comes with parts that allow adjustment of the size, shape, and color of the illumination beam, and adjustment of lens magnification power to allow focus on different eye structures as well as for compensation in cases of myopia or hyperopia in both subject and observer.
Described simply, the standard ophthalmoscope is light with different optical modifications such as filters and lenses of different sizes. For this purpose, the magnifying power of traditional ophthalmoscopes and their many different variations help doctors see patients’ retinas clearly and conveniently. This tool operates by illuminating the retina, the thin layer of tissue lining the eye near the optic nerve, through the hole in the iris, the pupil. The light rays that hit these parts of the eye are then able to form an image of the fundus, the overall area opposite the lens and pupil, magnified for viewing through the lens of the ophthalmoscope.
Given the importance of such a procedure in improving and saving lives, different technological advances have helped update and refine the tool with which doctors can successfully conduct fundoscopic examinations. Aside from direct ophthalmoscopes, some doctors also make use of indirect ophthalmoscopy by shining a light from an instrument worn on the head, viewing the eye through a separate diopter lens held close to the eye. This other procedure gives a wider field of view than direct ophthalmoscopy and produces an inverted image of the back of the eye. Slit-lamp ophthalmoscopy, on the other hand, requires patients to be seated in front of a large, stationary instrument with their head resting and kept in place. These machines are what we usually see in eye clinics and optical stores. Slit lamp ophthalmoscopes are low power microscopes that offer the same view as indirect ophthalmoscopes, but with a higher magnification. More advanced devices, such as the PanOptic Ophthalmoscope, offer a larger field of view and higher magnification than standard ophthalmoscopes, as well as allowing a greater distance between patient and doctor for more comfort.
The most commonly used device for fundoscopy is the standard direct ophthalmoscope, and this procedure can be properly done in a dimly-lit environment. First, the patient’s and doctor’s eyeglasses must be removed, but not contact lenses. It is advisable to give the patient some tissue in case of tearing. The patient is instructed to fix his gaze on the spot around 1 meter ahead. Doctors should refrain from talking with the patient during the procedure, because patients may tend to move their gazes involuntarily. Depending on the eye to be examined, the instrument is then held with the hand belonging to the same side as the examining eye. The patient’s left fundus is examined with the left eye and the right fundus with the right eye. The ophthalmoscope is turned on with the light intensity set at a two-thirds strength and the lens wheel at 0 diopters.
The first step in the fundoscopic procedure is to look for the patient’s red reflex. The patient’s eye is illuminated from a distance of around 12 to 15 inches to examine the red reflex (R/R) of the retina, where the eye appears to glow red. Once this has been achieved, the lens is adjusted to +10 diopters and standing from the patient’s side; the doctor slowly moves toward the patient while looking through the viewing aperture until he is 1-2 inches from the patient’s eye. While moving toward the patient, doctors usually place their hand on the patient’s forehead or shoulder. At +10 diopters, the anterior structures of the eye, such as the cornea, are the first ones to come into focus. Dialing the magnification from +10 to 0 effectively shifts the focus from the front to the back of the patient’s eye, towards the retina.
What exactly do doctors see when they shine these flashlights into our eyes? At its core, fundoscopy provides the only means to directly observe the arteries, veins, and central nervous system (the retina) in the intact, living patient. During the fundoscopic procedure, doctors look at structures collectively known as the eyegrounds, which include the retina, retinal blood vessels, optic disc, and some parts of the choroid.
Once the doctor successfully focuses the ophthalmoscope on the patient’s fundus and eyegrounds, it is important and useful to follow a methodological pattern of examination, particularly the 6-point fundal examination routine. The first structure is the optic disc, taking into consideration the 3 Cs, Cup, Color, and Contour, and the disc to cup ratio. Next are the 4 vascular arcades, namely the superotemporal, superonasal, inferotemporal, and inferonasal arcade vessels and retina. The relative size of the arteries and veins and the texture and color of the retina should be taken into account. Also, when observing these structures, the patient should be advised to look in the direction of the portion of the retina being examined. For instance, in observing the superior retina, the patient is asked to look up. Remember that the patient’s left and right are the opposite of your own. Finally, the last structure for observation is the macula, noting its color and size.
Due to a lot of factors such as the brightness of the light, refraining from blinking, and the close proximity to the doctor, fundoscopy can cause much pain or discomfort to the patient. Therefore, it’s best to keep the procedure to 30-35 seconds at a time, alternating between the two eyes to give the patient breaks. Also, it is crucial that the line of sight between examiner, ophthalmoscope, and patient is maintained as one moves around to see the different eye structures.
Other ophthalmoscopy procedures make use of roughly the same method with the light beam and diopter lens. In indirect ophthalmoscopy, the patient lays flat in a reclining chair, with much room for the doctor to move freely around the head, with two lens options at 20D and 28D. The slit-lamp examination, meanwhile, involves the patient sitting in front of the slit lamp ophthalmoscope with his head held steady. The eyelids, cornea, sclera, conjunctiva, and iris are some eye structures that can also be observed with the slit lamp ophthalmoscope, aside from the fundus.
In behavioral neuroscience, the Open Field Test (OFT) remains one of the most widely used assays to evaluate rodent models of affect, cognition, and motivation. It provides a non-invasive framework for examining how animals respond to novelty, stress, and pharmacological or environmental manipulations. Among the test’s core metrics, the percentage of time spent in the center zone offers a uniquely normalized and sensitive measure of an animal’s emotional reactivity and willingness to engage with a potentially risky environment.
This metric is calculated as the proportion of time spent in the central area of the arena—typically the inner 25%—relative to the entire session duration. By normalizing this value, researchers gain a behaviorally informative variable that is resilient to fluctuations in session length or overall movement levels. This makes it especially valuable in comparative analyses, longitudinal monitoring, and cross-model validation.
Unlike raw center duration, which can be affected by trial design inconsistencies, the percentage-based measure enables clearer comparisons across animals, treatments, and conditions. It plays a key role in identifying trait anxiety, avoidance behavior, risk-taking tendencies, and environmental adaptation, making it indispensable in both basic and translational research contexts.
Whereas simple center duration provides absolute time, the percentage-based metric introduces greater interpretability and reproducibility, especially when comparing different animal models, treatment conditions, or experimental setups. It is particularly effective for quantifying avoidance behaviors, risk assessment strategies, and trait anxiety profiles in both acute and longitudinal designs.
This metric reflects the relative amount of time an animal chooses to spend in the open, exposed portion of the arena—typically defined as the inner 25% of a square or circular enclosure. Because rodents innately prefer the periphery (thigmotaxis), time in the center is inversely associated with anxiety-like behavior. As such, this percentage is considered a sensitive, normalized index of:
Critically, because this metric is normalized by session duration, it accommodates variability in activity levels or testing conditions. This makes it especially suitable for comparing across individuals, treatment groups, or timepoints in longitudinal studies.
A high percentage of center time indicates reduced anxiety, increased novelty-seeking, or pharmacological modulation (e.g., anxiolysis). Conversely, a low percentage suggests emotional inhibition, behavioral avoidance, or contextual hypervigilance. reduced anxiety, increased novelty-seeking, or pharmacological modulation (e.g., anxiolysis). Conversely, a low percentage suggests emotional inhibition, behavioral avoidance, or contextual hypervigilance.
The percentage of center time is one of the most direct, unconditioned readouts of anxiety-like behavior in rodents. It is frequently reduced in models of PTSD, chronic stress, or early-life adversity, where animals exhibit persistent avoidance of the center due to heightened emotional reactivity. This metric can also distinguish between acute anxiety responses and enduring trait anxiety, especially in longitudinal or developmental studies. Its normalized nature makes it ideal for comparing across cohorts with variable locomotor profiles, helping researchers detect true affective changes rather than activity-based confounds.
Rodents that spend more time in the center zone typically exhibit broader and more flexible exploration strategies. This behavior reflects not only reduced anxiety but also cognitive engagement and environmental curiosity. High center percentage is associated with robust spatial learning, attentional scanning, and memory encoding functions, supported by coordinated activation in the prefrontal cortex, hippocampus, and basal forebrain. In contrast, reduced center engagement may signal spatial rigidity, attentional narrowing, or cognitive withdrawal, particularly in models of neurodegeneration or aging.
The open field test remains one of the most widely accepted platforms for testing anxiolytic and psychotropic drugs. The percentage of center time reliably increases following administration of anxiolytic agents such as benzodiazepines, SSRIs, and GABA-A receptor agonists. This metric serves as a sensitive and reproducible endpoint in preclinical dose-finding studies, mechanistic pharmacology, and compound screening pipelines. It also aids in differentiating true anxiolytic effects from sedation or motor suppression by integrating with other behavioral parameters like distance traveled and entry count (Prut & Belzung, 2003).
Sex-based differences in emotional regulation often manifest in open field behavior, with female rodents generally exhibiting higher variability in center zone metrics due to hormonal cycling. For example, estrogen has been shown to facilitate exploratory behavior and increase center occupancy, while progesterone and stress-induced corticosterone often reduce it. Studies involving gonadectomy, hormone replacement, or sex-specific genetic knockouts use this metric to quantify the impact of endocrine factors on anxiety and exploratory behavior. As such, it remains a vital tool for dissecting sex-dependent neurobehavioral dynamics.
The percentage of center time is one of the most direct, unconditioned readouts of anxiety-like behavior in rodents. It is frequently reduced in models of PTSD, chronic stress, or early-life adversity. Because it is normalized, this metric is especially helpful for distinguishing between genuine avoidance and low general activity.
Environmental Control: Uniformity in environmental conditions is essential. Lighting should be evenly diffused to avoid shadow bias, and noise should be minimized to prevent stress-induced variability. The arena must be cleaned between trials using odor-neutral solutions to eliminate scent trails or pheromone cues that may affect zone preference. Any variation in these conditions can introduce systematic bias in center zone behavior. Use consistent definitions of the center zone (commonly 25% of total area) to allow valid comparisons. Software-based segmentation enhances spatial precision.
Evaluating how center time evolves across the duration of a session—divided into early, middle, and late thirds—provides insight into behavioral transitions and adaptive responses. Animals may begin by avoiding the center, only to gradually increase center time as they habituate to the environment. Conversely, persistently low center time across the session can signal prolonged anxiety, fear generalization, or a trait-like avoidance phenotype.
To validate the significance of center time percentage, it should be examined alongside results from other anxiety-related tests such as the Elevated Plus Maze, Light-Dark Box, or Novelty Suppressed Feeding. Concordance across paradigms supports the reliability of center time as a trait marker, while discordance may indicate task-specific reactivity or behavioral dissociation.
When paired with high-resolution scoring of behavioral events such as rearing, grooming, defecation, or immobility, center time offers a richer view of the animal’s internal state. For example, an animal that spends substantial time in the center while grooming may be coping with mild stress, while another that remains immobile in the periphery may be experiencing more severe anxiety. Microstructure analysis aids in decoding the complexity behind spatial behavior.
Animals naturally vary in their exploratory style. By analyzing percentage of center time across subjects, researchers can identify behavioral subgroups—such as consistently bold individuals who frequently explore the center versus cautious animals that remain along the periphery. These classifications can be used to examine predictors of drug response, resilience to stress, or vulnerability to neuropsychiatric disorders.
In studies with large cohorts or multiple behavioral variables, machine learning techniques such as hierarchical clustering or principal component analysis can incorporate center time percentage to discover novel phenotypic groupings. These data-driven approaches help uncover latent dimensions of behavior that may not be visible through univariate analyses alone.
Total locomotion helps contextualize center time. Low percentage values in animals with minimal movement may reflect sedation or fatigue, while similar values in high-mobility subjects suggest deliberate avoidance. This metric helps distinguish emotional versus motor causes of low center engagement.
This measure indicates how often the animal initiates exploration of the center zone. When combined with percentage of time, it differentiates between frequent but brief visits (indicative of anxiety or impulsivity) versus fewer but sustained center engagements (suggesting comfort and behavioral confidence).
The delay before the first center entry reflects initial threat appraisal. Longer latencies may be associated with heightened fear or low motivation, while shorter latencies are typically linked to exploratory drive or low anxiety.
Time spent hugging the walls offers a spatial counterbalance to center metrics. High thigmotaxis and low center time jointly support an interpretation of strong avoidance behavior. This inverse relationship helps triangulate affective and motivational states.
By expressing center zone activity as a proportion of total trial time, researchers gain a metric that is resistant to session variability and more readily comparable across time, treatment, and model conditions. This normalized measure enhances reproducibility and statistical power, particularly in multi-cohort or cross-laboratory designs.
For experimental designs aimed at assessing anxiety, exploratory strategy, or affective state, the percentage of time spent in the center offers one of the most robust and interpretable measures available in the Open Field Test.
Written by researchers, for researchers — powered by Conduct Science.


Monday – Friday
9 AM – 5 PM EST
DISCLAIMER: ConductScience and affiliate products are NOT designed for human consumption, testing, or clinical utilization. They are designed for pre-clinical utilization only. Customers purchasing apparatus for the purposes of scientific research or veterinary care affirm adherence to applicable regulatory bodies for the country in which their research or care is conducted.